Quick Start
This chapter explains how to complete a basic building placement workflow.
Before you begin, make sure that:
- The plugin is enabled.
- Asset Manager is configured.
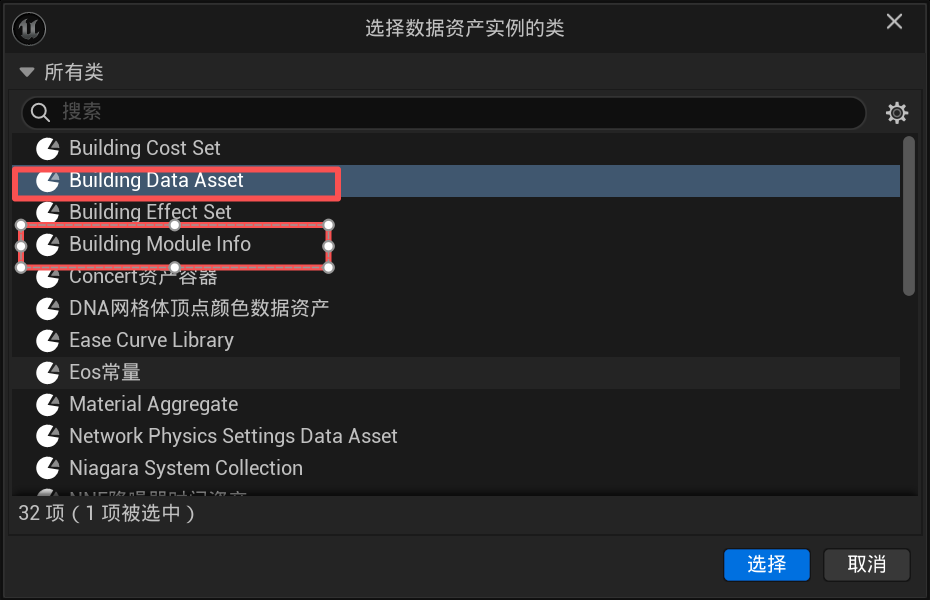
1. Create a Building Data Asset
Quick Creation
Right-click a Static Mesh asset and select Create Asset to quickly create:
BuildingModuleInfoBuildingDataAsset
After creation, move the assets into a directory configured in Asset Manager.
Manual Creation
Right-click in the Content Browser and select:
Miscellaneous (Other) → Data Asset → BuildingDataAsset
2. Select a Rendering Mode
HISM
HISM is suitable for large numbers of repeated static building modules, such as foundations, walls, floors, and roofs.
Set Render Mode to HISM, then create a BuildingModuleInfo:
Miscellaneous (Other) → Data Asset → BuildingModuleInfo
Configure the following properties:
MeshBuild Collision Profile
Then assign it to Module Definition in the BuildingDataAsset.
Actor
Actor mode is suitable for buildings that require independent logic, such as doors, containers, and workbenches.
Set Render Mode to Actor, then assign a Blueprint class derived from BuildingEntityActor to Actor Class.
3. Configure the Preview Mesh
A Preview Mesh is required for both HISM and Actor rendering modes.
It is used to:
- Display the building preview
- Perform collision and occupied-space checks
- Read snapping Sockets
- Calculate building bounds
In most cases, you can use the building's actual Static Mesh.
Preview Material
To display the building placement state using colors—for example, green for valid placement and red for invalid placement—connect the MF_MBS_VisualStateTint material function to the material’s Emissive Color input
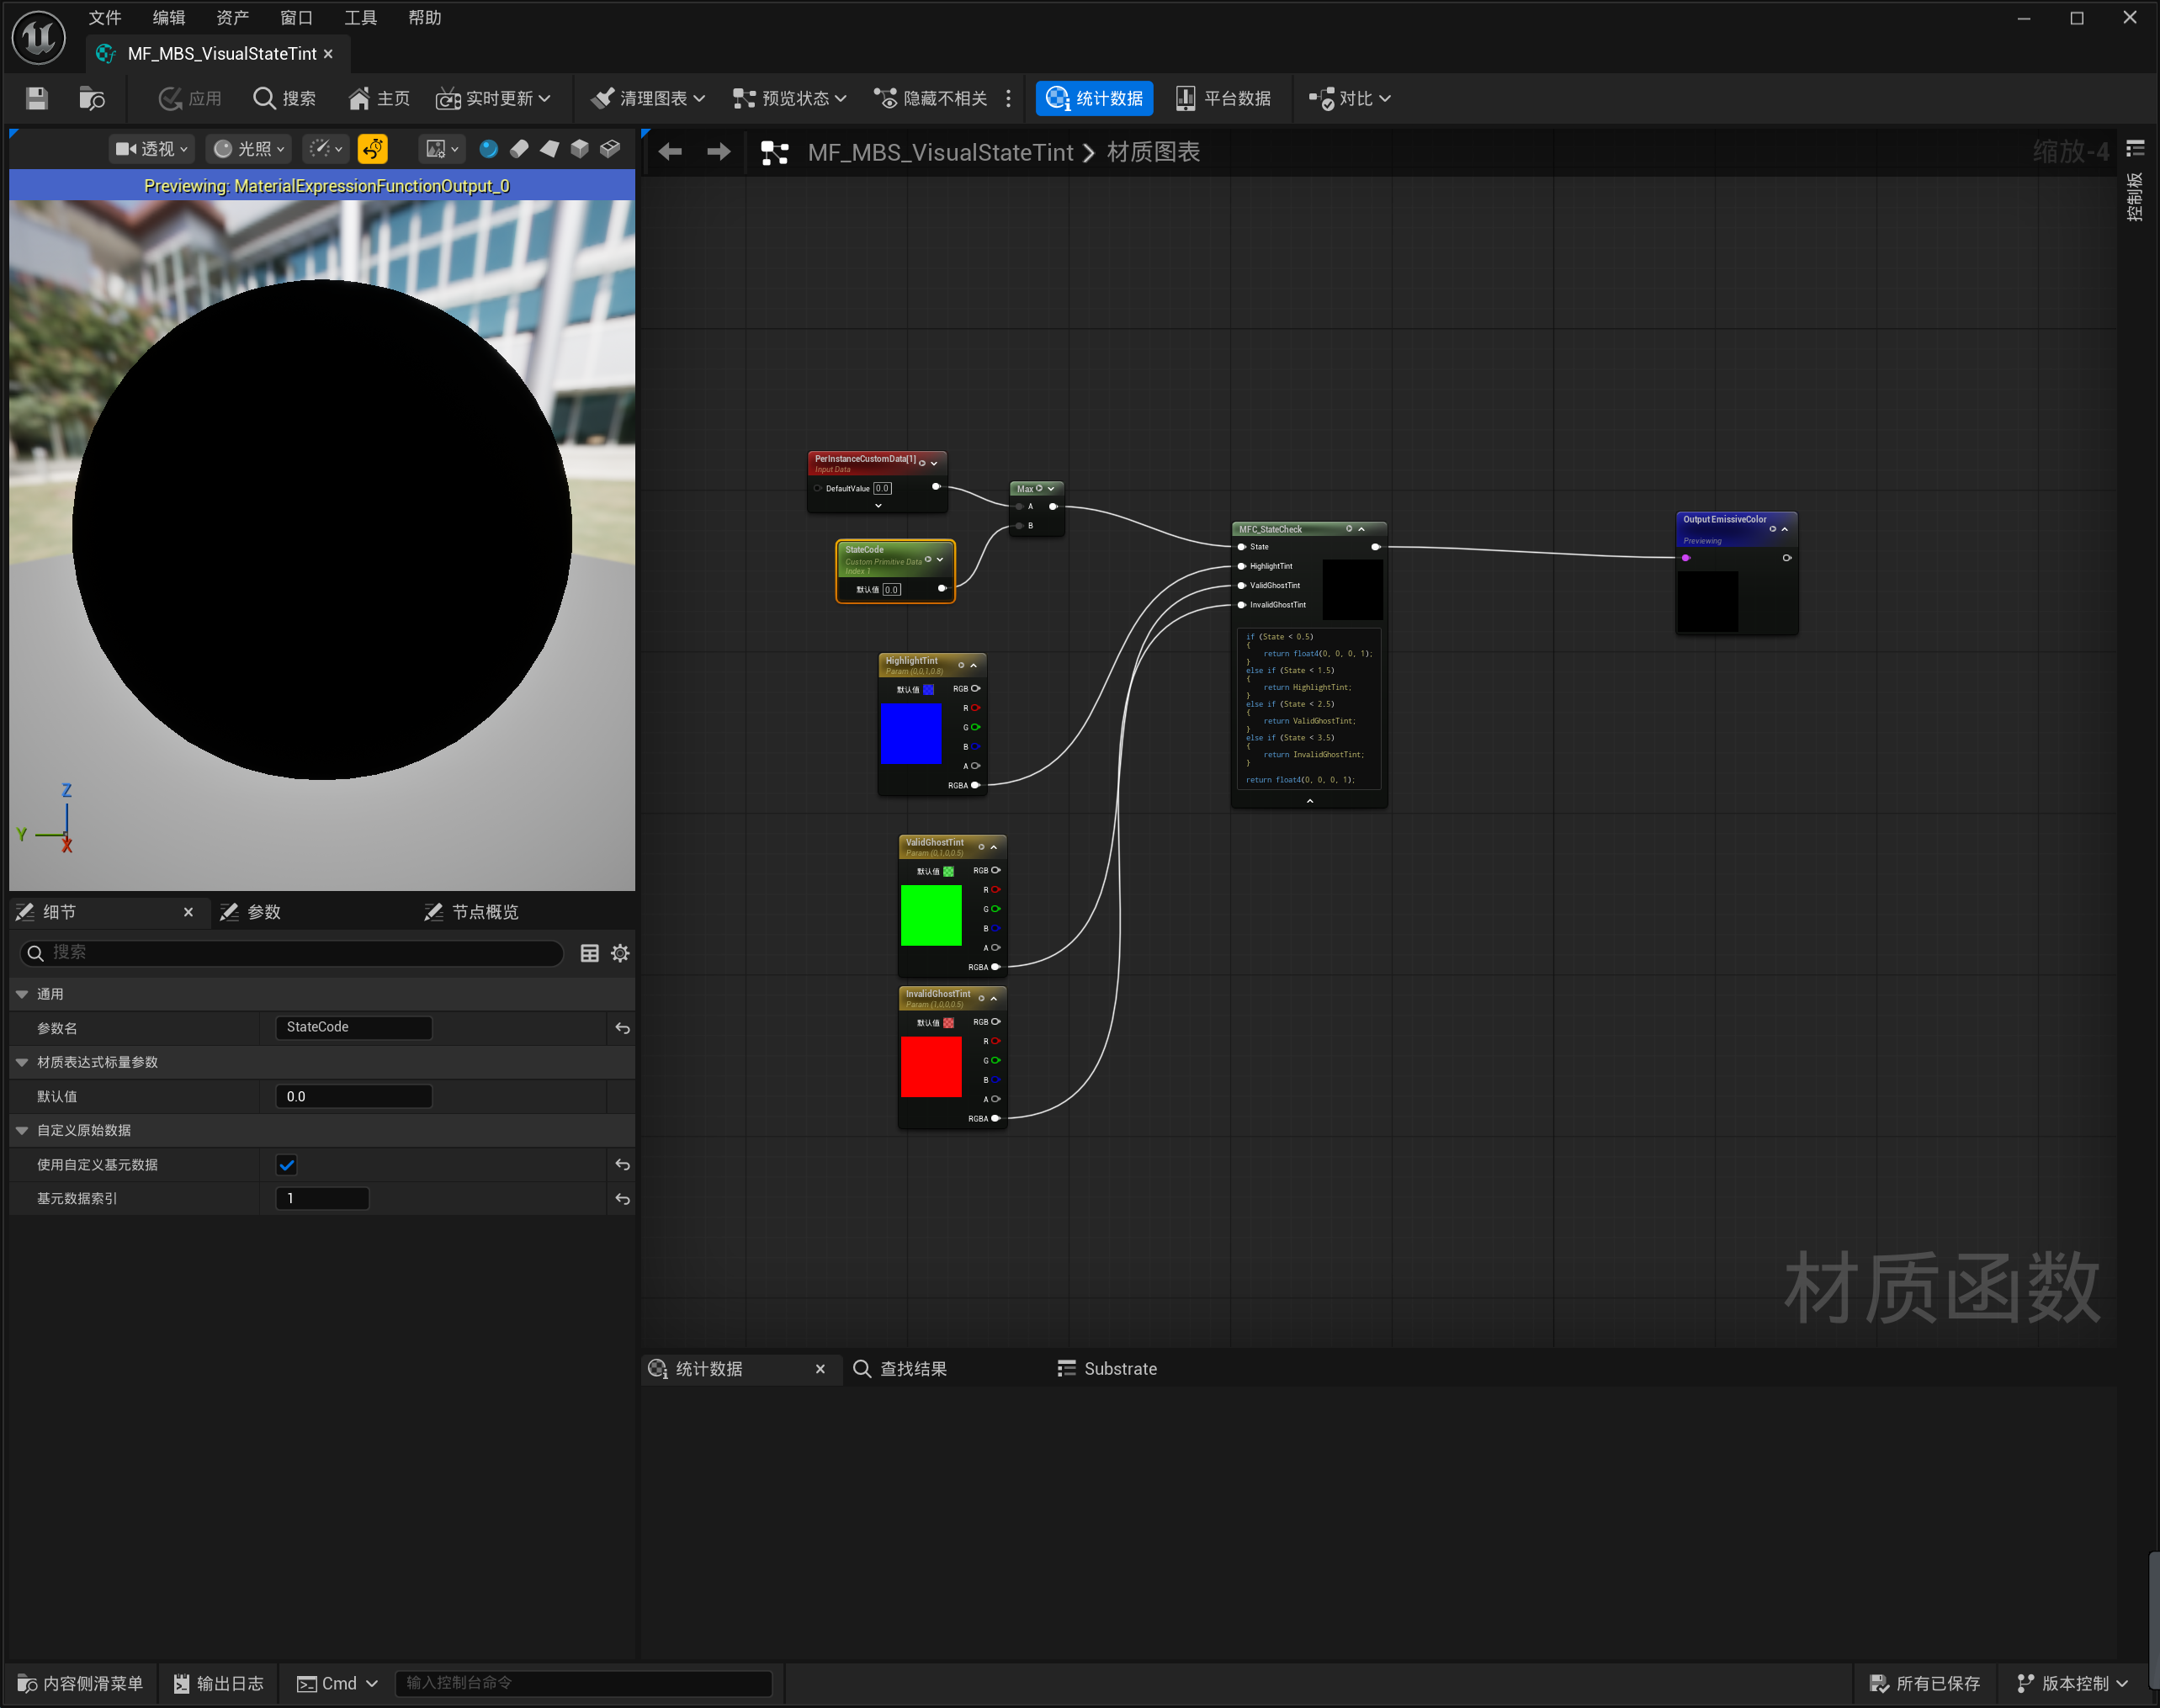
For more information, see Visual.
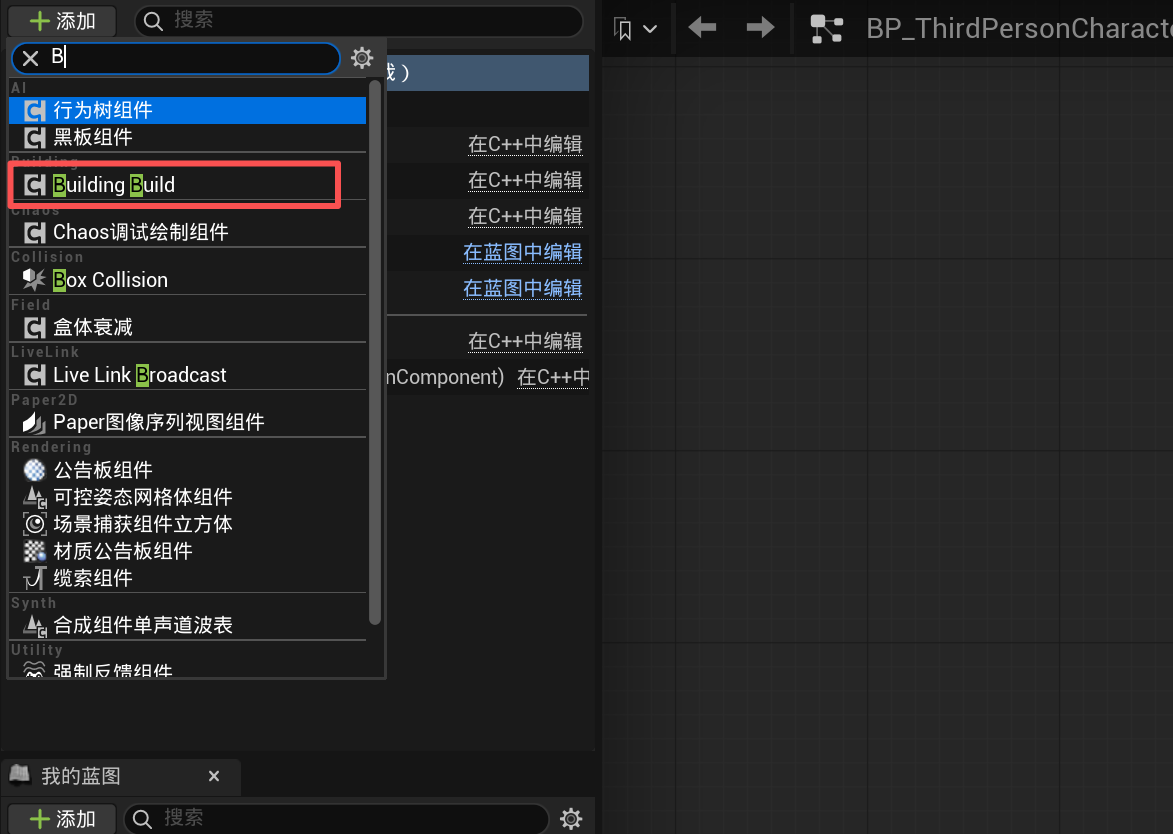
4. Add the Building Component
Add the following component to the player character or building Pawn:
This component handles building previews, snapping, placement validation, construction, movement, and removal.
5. Enter Building Mode
Configure the building UI under Project Settings → Building System.
Use Default: The plugin automatically creates and manages the UI.Disabled: The plugin does not manage the UI.

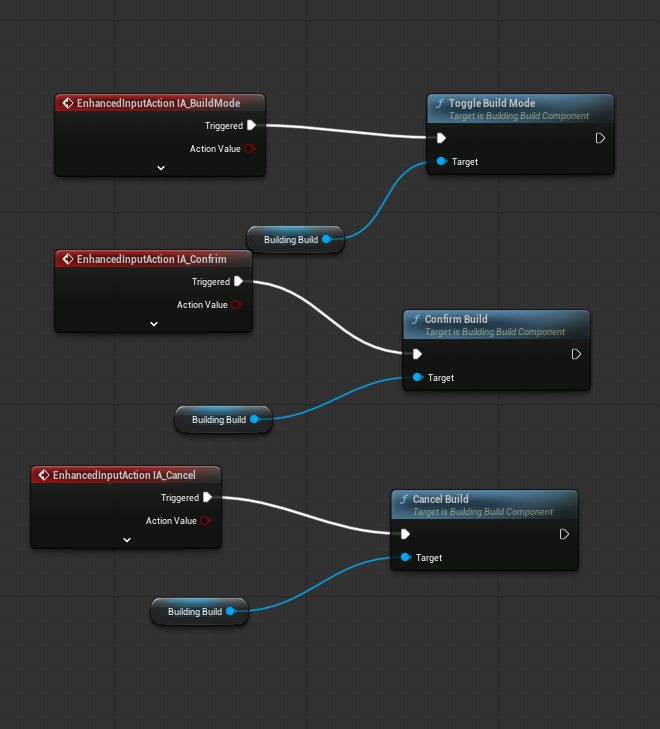
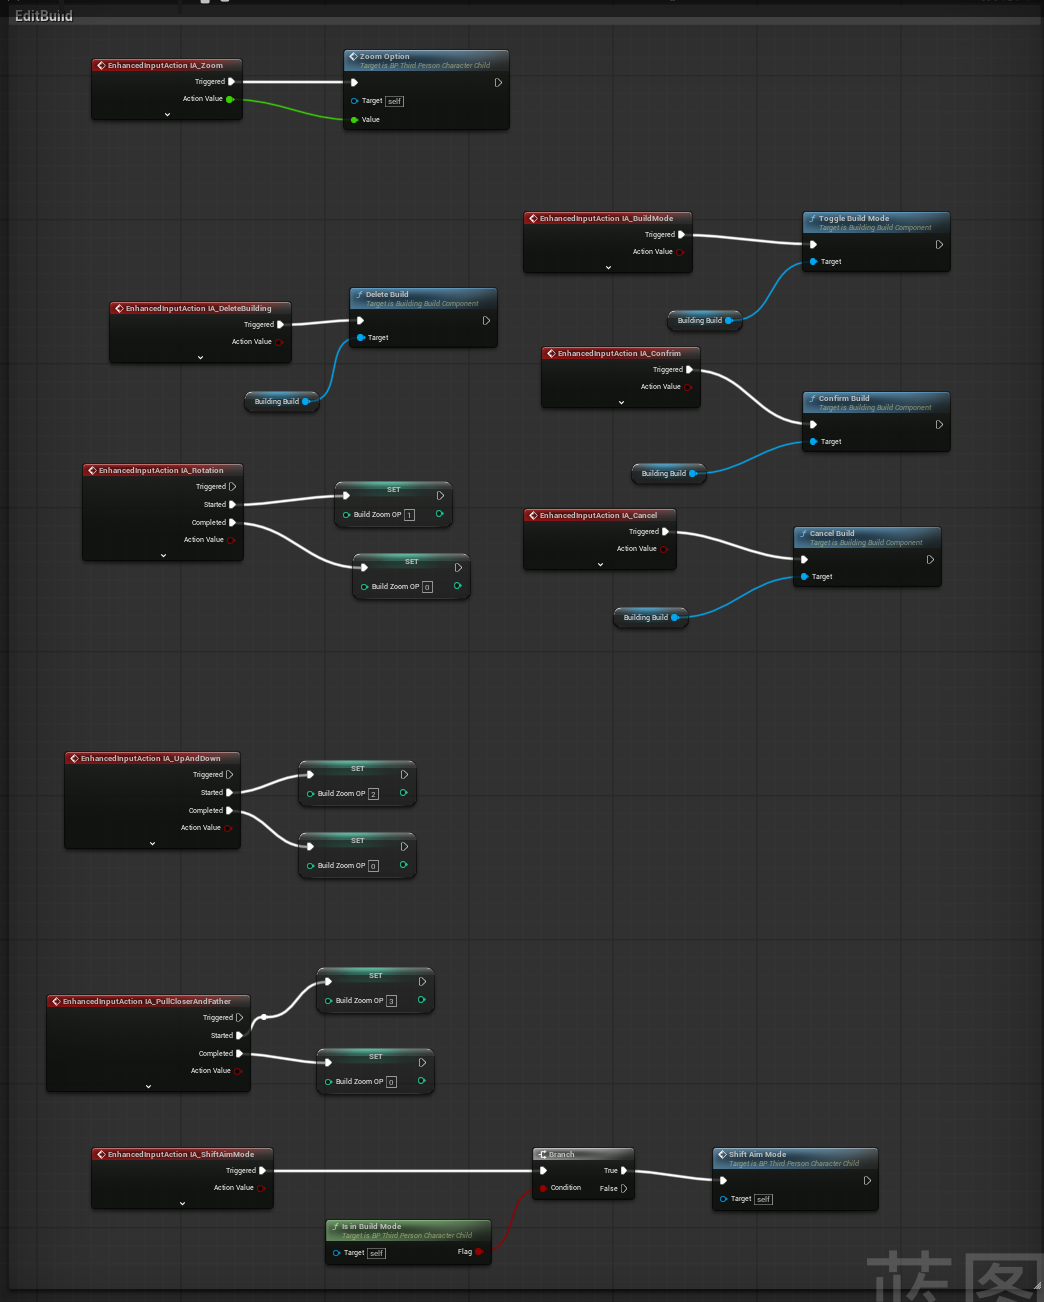
Call the following function on BuildingBuildComponent:
Toggle Build Mode, Confirm Build, Cancel Build
This function can be bound to a keyboard shortcut, UI button, hotbar slot, or workbench interaction.
The plugin also provides functions for adjusting rotation, height, and preview distance.
For complete details, see the Building Build Component API.
6. Check the Building Preview
After entering building mode and selecting a building, the system automatically performs:
- Surface positioning
- Socket snapping
- Collision checks
- Placement validation
The Snapping System must be configured before snapping can be used.
Preview Material
Connect the MF_MBS_VisualStateTint material function to Emissive Color to quickly display the default preview states.
7. Confirm Construction
When the preview is in a valid position, call:
Confirm Build
In single-player mode, the building is created directly.
In multiplayer mode, the client sends a request to the server. The server validates the request, creates the building entity, and synchronizes it with the clients.
8. Test the Result
Run the game and verify that:
- The preview moves correctly.
- Buildings can be placed in valid locations.
- Placement is blocked in invalid locations.
- HISM and Actor buildings are created correctly.
- Buildings are assigned to the correct Chunk.
If a building cannot be placed, check the following first:
- The Static Mesh has simple collision.
- The collision channels and profiles are configured correctly.
- The data assets are fully configured.
Building Build Componenthas been initialized correctly.
9. Test Multiplayer Mode
Use PIE to test with a Listen Server:
- Set the number of players to two or more.
- Select
Play As Listen Server. - Place a building from a client.
- Confirm that the building appears correctly on the server and other clients.